How to clean up LCD LED Monitor screen

Do you know the how to clean the monitor screen of your computer or laptop? How to clean LCD screens or the latest LED screen and not harm the screen?This post bought to you by basic computer hardware knowledge blog..
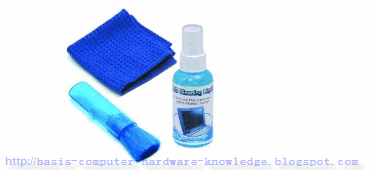
How to clean uo LCD LED Monitor screen

Like most of us ,we might clean the laptop screen or LCD TV,plasma TV with water which is wrong, An LCD (liquid crystal display) or LED( light-emitting diodeconsists)is a soft film that is very sensitive and might damage from scratches, smudging, and clouding caused by the use of improper cleaning agents and harsh cloths.


DON'T! use ordinary tap water often include chemicals like chloride that will leave a residue on your screen.In additional coarse, paper towels or cloths may even scratch and damage your very sensitive LCD display, causing clouding and can even lead to dead pixels.

YOU need to be to be very careful when cleaning up you LED monitor or LCD screen ,wrong kind of cloth will most likely scratch the display screen,learn to use the proper way to clean an LED and LCD screen.

When you at computer store,you've probably have seem some of those LCD,LED cleaning solutions ,yes there are made for cleaning your monitor screen ,the best part is there will always included a soft cloth that is specialty used of cleaning the surface of monitor screen,and a bottol of cleaning liquid,the good news is you can DIY the cleaning liquid yourself , you only need 2 ingredients which is Isopropyl alcohol and Distilled Water.

DO NOT use rubbing alcohol, as it has lubricants in it that will smudge the screen and make it cloudy and just a gawd awful mess!For the same reasons why you DO NOT use 'rubbing alcohol' to clean cassette tape heads or CD/DVD lenses ...

The lubricant in rubbing alcohol will do them more harm than good!You will be able to find 85% (or better) pure isopropyl alcohol -- without lubricants added -- at most drugstore or pharmacies.Note that the 50% isopropyl alcohol cleaning solution seems to be endorsed by IBM also: http://www-307.ibm.com/pc/support/site.wss/document.do?lndocid=MIGR-4A2P54

The step is easy and simple,just mix the both liquid which is Isopropyl alcohol and distilled water in equal parts (50/50) ,you can moxing up them inside an empty Windex-like bottle.Warning! Do not use tap water!

Tap water is diffrence to Distilled Water it will leave white smears on your screen after cleaning it up because of the dissolved minerals inside the water.

Remember always use a good, soft piece of microfiber cloth to clean your LCD ,LED monitor screen. Don't use paper ,tissues!! i know there were many people used paper ,tissues to cleaning up the screen,using those on your LCD,LED screen would be just like scrubbing sandpaper on it and may scratch it permanently.

Another point to remember is always turn off your LCD,LED screen while cleaning.,Dampen your piece of soft cloth with your cleaning mixture and then wipe the display gently from top to bottom. Never spray liquid directly onto the monitor screen!!!

Do it right ,use the right material ,after cleaning the screen, wait a few minutes to let your screen dry, and then turn it back on,your LCD,LED screen should now be sparkling clean.


others suggestion on materiel clean uo LCD LED Monitor screen:

-Distilled Water+Vinegar
Vinegar mixed with Distilled water at a concentration of no more than 10% vinegar. That's 6 1/2 tablespoons of vinegar per quart of water, 1 1/2 tablespoons per cup, or 100 ml per liter.

-Isopropyl Alcohol
-Petroleum Benzene

If you not sure how to mix those materail,you might also use "Glass Plus: Glass & Surface Cleaner" spray.which consists of 'Biodegradable cleaning agents', and it's essentially isopropyl alcohol.

Any cleaning products you use,remember,you should never spray anything directly on the screen. Liquid and electronics don't get along well and it's possible for the sprayed solution to get inside the monitor.

If you thinking to use a product that was specifically made to clean LCD screens,you can buy one online at Amazon ,it really cheap and effective...

Klear Screen iKlear iPod,LCD Cleaning Kit
Endust for Electronics LCD & Plasma Pop Up Wipes 70 CT 11506

How to use an lap top to work with TV projectors

SAN FRANCISCO - JANUARY 15:  (FILE PHOTO) Appl...Image by Getty Images via Daylife

What's the most basis thing we should know when connecting lap top to the TV large screen projectors?

Laptops and Projectors: How to,Tips and Hints By Computer knowledge Blog.

Lap-top is protable compare to desktop home PC ,since it is easy to carry around ,it can use as a presentation tool too.This section will help you learn how this takes place and how to make your laptop work with "projectors".

Because there are literally thousands of laptop configurations, models, screen sizes and screen resolutions out there, we cannot know how each laptop works.

Please understand that the information presented here is no substitute for reading your instruction manual, testing beforehand or a hands-on training. Spending 30 minutes testing the equipment BEFORE any presentation can save you a lot of time.

How to use an lap top to work with TV projectors

Before you get stated, you gonna need to know these stuffs:

* know your laptop's display requirements.
* know your laptop's resolution requirements.
* Know how to configure your ethernet adapter for the Internet (we do not have information on IP addresses).
* Always have a backup plan.

Attaching your computer to TV projectors:
You attach a VGA cable FROM the laptop to the projector or console.

The cable attaches to your laptop via the EXTERNAL MONITOR port on the back of your laptop:

Important note: Some laptops like the Sony Vaio, the Apple iBook, Powerbooks and MacBookPro do not have standard VGA monitor connectors. Make sure you have any adapters or docking ports with you or you will not be able to connect to the consoles.

And the standard VGA connection show like below.This is the monitor out connector on the back panel of a Apple G3. The connection on a PC is identical.  


mac vga detail

This is a standard VGA cable connector.

  vga connector

These are the steps  in which you do things:
  1. Connect the VGA cable from the laptop to the projector or console.
  2. Turn on the PROJECTOR, let it warm up and select the proper COMPUTER input using the MODE or INPUT button on the remote control.
  3. Turn on your computer LAST. (Never rely on your laptop's battery. It will fail you. Always bring your AC Adapter.)
This is important because when you turn on your lap top, it will search all the ports and connectors to vertife what's hooked up to it. So theoretically, the computer will know there is a projector connected and send the signal that dispaly on the screen out to the projector. 

But (there's always a but) what do you do when it doesn't send the signal to the projector? 

ALWAYS CHECK THIS FIRST: Is the projector's input set to the correct COMPUTER input? If it is, try the following:

For PC users: If you get an image on the laptop screen but not on the projector, check the following:
  1. On your laptop's keyboard, find the key marked "FUNCTION" (usually on the lower left corner of the keyboard).
  2. Then, search for a key that has either the letters "LCD/CRT" or a little monitor icon. Most often, it will be in the top row of keys marked F1 through F12, but not always.
  3. When you have both keys located, press the FUNCTION key and then the LCD/CRT key that you located before. It might take a couple of seconds for the computer to react.
    This should toggle the screen image through a cycle like this:  Image on Laptop Screen | Image on Projector | Image on Both
So if you press the "Function F" key sequence once, you'll get an image on the projector, but your laptop screen will go black. Press the key sequence again and you'll see the image through the projector and on your laptop. (This information will be in your laptop's instruction manual.)
For MAC users OS X:
The instructions for setting your display and mirroring preferences are available in two formats: HTML and PDF.
Know your laptop! Read the manual and carry it with you. Always do a dry run before your class starts to work out any bugs.

SCREEN RESOLUTIONS:
Screen resolution affects what you see projected and how it looks. This will be important if you use fine, detailed images and text.

The back story: When desktop computers were first introduced, the monitors all had the same resolution: 640 pixels wide by 480 pixels high.
Today, monitors and computers have advanced to the point where many different resolutions are possible from 640x480 up to 1920x1200 pixels. So-called "standard" resolutions are: 640x480, 800x600, 1024x768. Anything else is going to cause problems with a projector.

(Just to confuse you further, some older laptops can only display 800x600 pixels using the laptop's screen, but can output to a video projector a 1024x768 resolution image. Laptops can even split the display so half the desktop is in the laptop's screen, the other half is sent to the video projector. Yikes. See why we recommend testing it first?)

To add to the fun, with some older or less expensive laptops, the electronics that control the display may not be powerful enough to send the computer's signal to the laptop screen and to a projector at the same time. This means you will have to shut off the laptop screen to get an image on a projector.

Standard TV projectors can display up to 1024x768 (higher resolutions will be compressed down to 1024x768).
So, what does this mean for you?

In a nutshell: If your laptop has a non-standard display, the laptop screen and the projector image may not match. For example, users of the Toshiba 8300 will note that the native resolution on the laptop is 1400x1050. That will cause all sorts of problems with our consoles. When you change the setting to 1028x1024, the laptop screen has black bars on the sides. This is normal. The same thing happens with Apple's G4 15" Powerbooks.

So what should you do? TEST it before you need it. Get into your classroom and try it before your first class. 

One more thing... Set your color to 16-bit (Windows users). Some laptops won't mirror if the color is set to 32-bit.

References:
http://www.sfsu.edu/